Fujifilm Finepix S100FS Review
Fujifilm Finepix S100FS Introduction
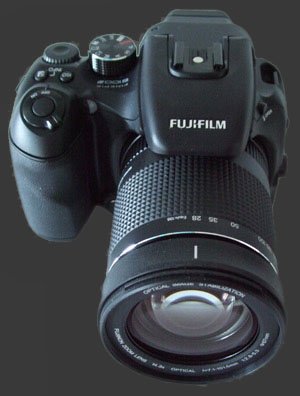
The Fuji Finepix S100FS is a large high-end fixed lens digital camera aimed at prosumers. Fuji calls it the most sophisticated camera ever made. It is an SLR-styled camera with complete manual controls, a mechanical lens and numerous buttons to give it a professional feel.
This camera's outstanding feature set includes:
- 11 Megapixels sensor
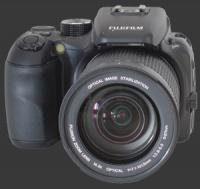
- 14.3X Stabilized optical zoom lens
- Starts at 28mm wide-angle and reaches 400mm
- Mechanical zoom ring
- Electronic focus ring
- ISO sensitivity ranging from 100 to 10000
- Shutter speeds from 1/4000s to 30s
- Selectable dynamic range from 100% to 400%
- 4 Film-simulation modes
- Bracketing of film-simulation, dynamic range and exposure
- Complete set of manual controls
- Unlimited high-quality movie recording
- Hot-shoe and sync-port for external flashes
Fujifilm Finepix S100FS Suitability - What is it good for?
The Fuji Finepix S100FS is designed for a all sorts of photography. Unlike most fixed-lens cameras, the S100FS is as large as the average DSLR. It is quite sturdy and feels solid. Even the moveable LCD and the memory card door feel sturdier than most. Since it weighs 912gIncluding battery and SD card, it feels more like a professional tool. The camera can be held securely thanks to its large rubberized grip with a horizontal indentation for the index finger. On the back side of the camera, an inward curvature prevents the thumb from slipping to the side.
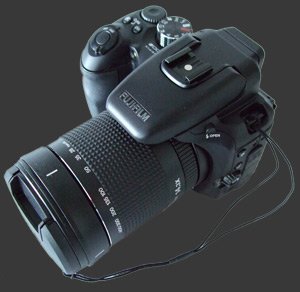
Pictures from the S100FS can be printed nicely in sizes up to 20 "x15" thanks to its high quality 11 megapixels Fuji SuperCCD HR sensor. The optical zoom lens starts at 28 mm, which is a moderate wide angle, and goes all the way to 400 mm which is a substantial telephoto. Near the wide-angle end, the lens can focus as close as 1 cm in super-macro mode. This makes this digital camera suitable for most photography subjects including architecture, wildlife and macro.
Since this camera provides ISO settings from 100 to 10000 and
shutter-speeds from 1/4000th of a second to 30 seconds, it
can be used for a vast range of photographic conditions and
creativity. Indoor and social occasions can be captured well
using high-ISO settings, while low-light photography can
be captured using the slow shutter-speeds. Even indoor
sports can be photographed using fast shutter speeds and
high-ISO settings available with the S100FS. Other
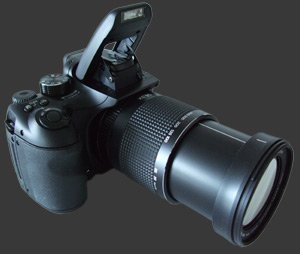
lighting conditions can be helped by using the Fuji S100DS's powerful built-in flash
or an external flash attached to the camera's hot-shoe or sync-port. The Fuji S100FS also allows control over the dynamic range it captures. Possible options are 100%, 200% and 400%, although these are not available at all ISO settings.
Storage options are also versatile
with both SD-HC and xD cards being supported. Since SD cards
are cheaper, faster (See our Memory
Performance feature) and available in larger
sizes than xD, we recommend people who don't already have memory cards of either
type to buy SD cards for the Fuji S100FS.
Fujifilm Finepix S100FS Capability - What can it do?
Beyond taking pictures in a large variety of conditions suitable for large prints, the Fuji Finepix S100FS packs some useful and interesting features. Below is a list of its most useful features, followed by explanations, when required.
- Film-simulation: Provia, Velvia, Soft, Portrait.
- Dynamic range: 100%, 200% and 400%.
- White-balance: Auto, 7 Preset and 2 Custom, all fine-tunable in 7 steps on Red-Cyan and Blue-Yellow scales.
- Metering modes: evaluativeAlso called segment or matrix, spot and average.
- Focus control: single auto focus, continuous auto focus, manual focus.
- Drive modes: single frame, first 7-frames, first 50 frames at 3 MP, final 7-frames, long period.
- Exposure compensation: +2 to -2 EV, in 1/3 stop increments.
- Flash compensation: -2/3..+2/3, 1/3 EV steps.
- Exposure bracket: 3 shots, 1/3, 2/3 or 1 EV steps.
- Film-simulation and dynamic-range bracketing, 3 shots.
- Auto focus modes: center, multi-pointCamera chooses a point to focus on, areaUser selects an area to focus on.
- Flash modes: auto, on, off, slow-syncAlso called rear-curtain sync.
- Face detection with or without redeye removal.
- Photography modes: fully automatic, program automatic, shutter priority, aperture priority, manual, 2 custom modes, 14 scene-modes and film-simulation bracket.
- Other: Auto exposure lock or toggle and focus check.
The Fuji Finepix S100FS brings several unique and rare features. The FS in S100FS stands for Film-Simulation and is a newcomer to this class of camera. Fuji offers 4 film types which differ in dynamic-range, color, tone and sensitivity. Additionally, each parameter can be increased or decreased independently of the film-simulation mode. The control over dynamic range is fairly new too. It is somehow related to ISO sensitivity which is why not all dynamic range options are allowed at all ISOs. Basically, dynamic range is increased from the default 100% by simulating capture of parts of the image at different ISO settings.
 Drive modes require some explanations. Obviously, in
single frame mode, the camera takes a single picture when the
shutter is pressed down. The
first 7-frames mode is the typical burst mode where the camera focuses once and
takes up to 7
picturesMetering for each one. It does so at 3 FPS, and shows a brief review of each picture
after its taken. The first 50-frame mode works the same way except that images are shot at 7 FPS and resolution is limited to 3 megapixels. Exposure bracketing produces
one properly exposed frame, one underexposed and one overexposed. The
increments are selectable to 1/3 EV, 2/3 EV or 1 EV. Film simulation bracketing takes an image in Provia, Velvia and Soft modes. Bracketing of dynamic range takes shots at 100%, 200% and 400%. It is unclear why the camera needs to take three shots when bracketing film-simulation or dynamic-range, instead of taking one and outputting three.
Drive modes require some explanations. Obviously, in
single frame mode, the camera takes a single picture when the
shutter is pressed down. The
first 7-frames mode is the typical burst mode where the camera focuses once and
takes up to 7
picturesMetering for each one. It does so at 3 FPS, and shows a brief review of each picture
after its taken. The first 50-frame mode works the same way except that images are shot at 7 FPS and resolution is limited to 3 megapixels. Exposure bracketing produces
one properly exposed frame, one underexposed and one overexposed. The
increments are selectable to 1/3 EV, 2/3 EV or 1 EV. Film simulation bracketing takes an image in Provia, Velvia and Soft modes. Bracketing of dynamic range takes shots at 100%, 200% and 400%. It is unclear why the camera needs to take three shots when bracketing film-simulation or dynamic-range, instead of taking one and outputting three.
The final 7-frames drive-mode is a Fuji invention which has made it into many Fuji digital cameras and several models from other manufacturers. Simply put, the camera takes pictures continuously at 3 FPS but only saves the last 7 frames taken. This is a very valuable feature for action shots when it is difficult to anticipate the action. Finally, the long period drive mode takes pictures at roughly 1 FPS, the number of pictures taken depending on the speed of the memory used. Most photography modes and scene modes are also typical.
The AE-L button either locks the exposure while it is pressed or sets it until the AE-L button is pressed again. The specific operation of this button depends on an obscure menu which chooses between AE-L 1 and AE-L 2. The Focus-Check button magnifies the center of the live-preview, to facilitate manual focusing or validating the auto-focus. Unfortunately, neither the LCD nor EVF is precise enough to make this entirely accurate.
 |

|
Please Support Neocamera
All information on Neocamera is provided free of charge yet running this website is a huge endeavor. Purchases made via affiliate links found throughout the site help keep it running and up-to-date. There is no additional cost to you, so please consider buying via these links to our affilates:


Thank you for your support!


Fujifilm S100FS Highlights
Sensor-Size: 9 x 7mm

Actual size when viewed at 100 DPI
| 11 Megapixels Ultra Zoom | ISO 100-3200 |
| 14.3X Mechanically Linked Wide Optical Zoom | Shutter 1/4000-30s |
| Built-in Stabilization | Full manual controls, including Manual Focus |
| 0.20" Built-in EVF 200K Pixels | Custom white-balance with 2 axis fine-tuning |
| 3 FPS Drive, 7 Images | Spot-Metering |
| 640x480 @ 30 FPS Video Recording | Hot-Shoe & Sync-Port |
| 2.5" LCD 230K Pixels | Lithium-Ion Battery |
| Secure Digital High Capacity, xD Internal Memory |
Dynamic Range Misunderstood
Dynamic range is a problem in photography because the world has a luminance range far greater than any sensor or film can capture. If dynamic range was not a problem, there would be no need for exposure. Exposure controls which range of luminance is recorded in a photograph.
The dynamic range that a camera captures refers to the range of luminance of the world which is recorded by the image sensor. The misconception is that the dynamic range of the resulting image files is different. In reality, all JPEG images have the same dynamic range, they are all 8-bits-per-component (hence 24-bits-per-pixel). That is, each color component can have a value between 0 and 255. No matter which camera produces a JPEG, it can produce one with pixel-components that are 0 and some that are 255.
Since the camera output has always the same dynamic range but sensors differ in the dynamic range which they can capture, a mapping occurs between the two ranges. This mapping compresses the captured dynamic range into the output dynamic range. Therefore, the wider the captured dynamic range, the lower the contrast in the resulting image. This is the reason why it is important to select an appropriate dynamic for the subject matter and not simply leave the camera to its maximum dynamic range.
Camera Bag
Your camera bag is empty. To add a camera or lens click on the star next to its name.
Your camera bag is empty.
Add cameras or lenses by clicking on the star next to their name.
Updates
2025.11.13

Best Gifts for Photographers in 2025 by Budget
The annual Neocamera Photography Gift Guide updated to 2025. Find great gifts for photographers with any price budget.
2025.07.07

Stellar Photo Recovery Review
Review of Stellar Photo Recovery V12. This Windows and MacOS software can recover photos and videos in a huge number of formats from memory cards, USB drives, SSDs and HHDs.
2025.05.14

Huion Kamvas 13 Gen 3 Review
In-Depth review of the Huion Kamvas 13 Gen 3 Pen Display Tablet for photographers and graphic artists.
2025.01.18

Fujifilm GFX 2025 Lens Roundup
Lens Review roundup of Fujifilm GFX Medium-Format lenses. Quality, performance and handling of the GF20-35mm F/4R WR, GF30mm F/3.5 Tilt-Shift and the GF55mm F/1.7.
2024.11.18

Best 2024 Photography Gifts for Every Budget
Great gifts for photographers and photo enthusiasts selected for every budget among the best products of 2024.
2024.08.07

Eye Protection Tips for Professional Photographers
The four main considerations for professional photographers regarding eyewear.
2024.07.14

Fujifilm X100VI Review
Flagship fixed-lens compact digital camera with a 40 MP sensor and Image-Stabilization, a first for the series. Retro design featuring dual control-dials, plus direct ISO, Shutter-Speed and EC dials. Its hybrid viewfinder can switch between EVF and OVF mode.
2024.05.09

Fujifilm GFX100 II Review
Flagship 102 Megapixels Medium-Format Mirrorless Digital Camera with 8-Stop 5-Axis IBIS, 8 FPS Drive, 8K Video and 400 MP Super-Resolution capture in a weatherproof and freezeproof body with dual control-dials and dual memory-card slots.
2024.04.03

Fujifilm X-T5 Review
Newest Fujifilm flagship boasting a 40 MP APS-C sensor, 5-axis IBIS with 7-stop efficiency, 15 FPS continuous drive, 6.2K Video capture, dual control-dials and dual SDXC UHS-II slots in a sturdy weatherproof and freezeproof body.
2023.11.20

Best Digital Cameras of 2023
Find out which are the Best Digital Cameras of 2023. All the new Mirrorless Digital Cameras from entry-level to high-end professional.
2023.07.10

Fujifilm X-H2 Review
40 Megapixels APS-C Hybrid Mirrorless Digital Camera with 7-stop IBIS. Fastest shutter ever and 8K video capture. Large builtin EVF with 0.8X magnification and 5.8 MP, plus an Eye-Start Sensor. Packed with features and large number of controls in a weatherproof and freezeproof body.
2023.05.07

Sony FE 20-70mm F/4G Review
Review of the unique Sony FE 20-70mm F/4G lens. The optical zoom of this lens spans ultra-wide-angle and medium focal-length coverage, making it one of the most versatile Full-Frame lenses on the market.
2025.11.13
2025.07.07
2025.05.14
2025.01.18
2024.11.18
2024.08.07
2024.07.14
2024.05.09
2024.04.03
2023.11.20
2023.07.10
2023.05.07