Nikon D3000 Review
Nikon D3000 Usability - How easy is it to use?
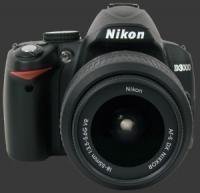
The ergonomics of the D3000 are good with all controls being placed within easy reach. The hand-grip is decently comfortable and provides a secure hold over the camera. Below the control-wheel on the rear, there is a slight protrusion which prevents the camera from slipping outwards. The Nikon D3000 feels reasonably sturdy.
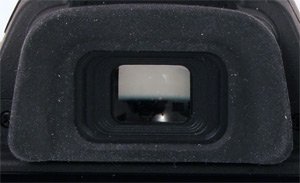 The D3000 has a medium-sized penta-mirror viewfinder which provides a relatively bright image. Just below the viewfinder is large 3" LCD with 230K pixels.
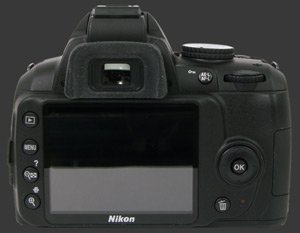
While gripping the camera, the forefinger can easily reach the EC and Info buttons which are located just behind the shutter-release. A single control-wheel, located on the camera's rear, adjusts a single exposure parameter. In Manual mode, it controls the shutter-speed when used alone and controls the aperture when used with the EC button. The AE-L/AF-L button is located within reach of the thumb. Below the AE-L/AF-L button is the 4-way controller which is used to select one of three focus points in Single-Point AF area mode.
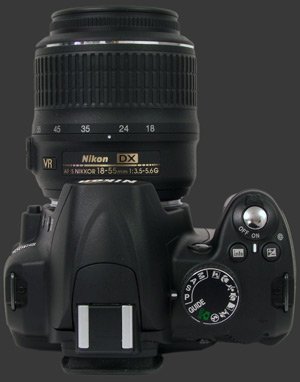
The mode-dial, located on top of the camera, is large with good click-points, making it difficult to move accidentally. The set exposure or scene mode is shown on the Info screen with a small color icon. Pressing the Zoom-Out button brings up a short description of the current mode, as one would guess by the ? next to it. What is great is that the D3000 actually describes how the camera will behave. In Landscape mode, for example, the Info screen says "For landscapes and cityscapes. Greens and blues are rendered vividly, with the foreground and background in focus". This implies not only use of a small aperture but also a change in color-rendition, thus overriding the set Picture Control style.
The Nikon D3000 has a unique Guide mode which is a new take on assisted camera settings. It is a hybrid mode blending scene modes and guided operation. The Guide mode is divided into sections for Shooting, View/Delete and Set-up. The view, delete and setup options are short-cuts to common operations for their respective tasks.
The Shoot section is the most interesting and useful. This section is divided into three subsections. Easy operation gets the user to select a type of subject and the camera selects a scene mode. From there you can start shooting or adjust certain settings, usually Flash, Release mode and AF-area mode, depending on the chosen subject. For example, choosing Night Portrait, the camera says "The camera is now in "Night" Mode. Use a tripod to prevent blur". Choosing More Settings from there lets the user change the Flash mode between Slow-Sync Auto Flash with Redeye Reduction, Slow-Sync Auto Flash or No Flash. This gives flexibility but narrows down choice to the most typical parameters for a type of subject.
One thing discovered while going through the Guide mode is that the AF-area mode can be set to 3D Tracking but this option is unfortunately not available in standard exposure modes, only in Guide and some Scene modes. The difference between 3D tracking and AF-C is that AF-C keeps a set point in focus while 3D Tracking can track a subject as it moves between focus-points.
For the Advanced operation, the camera sets an exposure mode, either A or S, and explains briefly how to control it. It is even possible to choose an aperture or shutter-speed on screen before starting to shoot. It can be changed later using the command-dial.
 The button to delete images is located below the 4-way controller. Double-tap it to delete an image. The delete operation is cancelled if it is not pressed twice. On the other side of the LCD, 4 buttons activate Playback mode, the menu-system, the help-system and the quick-change screen, respectively.
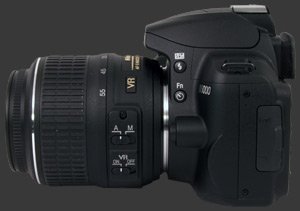
The left side of the camera features two more buttons: Fn and Flash. The Fn button was discussed previously. It can control one of several options, as selected in the menu-system. The Flash button, when used with the control-wheel, cycles through various flash-modes depending on the exposure-mode. When used with the control-wheel and the EC button at the same time, the Flash button controls flash-compensation.
Playback mode is shooting-priority. This means that when the shutter-release is half-pressed, playback is interrupted and the camera is ready to shoot. In playback mode, the help and quick-change button serve to zoom in and out of images. The control-wheel is used to scroll through images and can do so even while zoomed. This is a crucial feature to compare nearly identical images.
Detailed information on images is available using the up and down directions of the 4-way controller. One push up and a luminance histogram is displayed along with basic exposure parameters and more. A down push from there goes back to the image display. One more down push to get RGB histograms.
The rear LCD is typical for this class of camera. It's sharp, clear and has a reasonable anti-reflective coating. The LCD is used to display the Info screen. Pretty much all important settings are available. All changes made using external buttons such as EC, Fn and AE-L/AF-L are echoed to the Info screen.
 |


|
Please Support Neocamera
All information on Neocamera is provided free of charge yet running this website is a huge endeavor. Purchases made via affiliate links found throughout the site help keep it running and up-to-date. There is no additional cost to you, so please consider buying via these links to our affilates:


Thank you for your support!


Nikon D3000 Highlights
Sensor-Size: 24 x 16mm

Actual size when viewed at 100 DPI
| 10 Megapixels DSLR | ISO 100-3200 |
| Nikon F Mount 1.5X FLM | Shutter 1/4000-30s |
| 95% Coverage Medium Viewfinder | Full manual controls, including Manual Focus |
| Built-in Dust Reduction | Custom white-balance with 2 axis fine-tuning |
| 3 FPS Drive, Unlimited Images | Spot-Metering |
| 3" LCD 230K Pixels | Hot-Shoe |
| Lithium-Ion Battery | |
| Secure Digital High Capacity |
Camera Bag
Your camera bag is empty. To add a camera or lens click on the star next to its name.
Your camera bag is empty.
Add cameras or lenses by clicking on the star next to their name.
Updates
2026.05.21

Laowa 4.5-10mm F/2.8 Fisheye Zoom Lens Review
In-depth review of the Venus Optics Laowa 4.5-10mm F/2.8 Fisheye Zoom Lens. This lens zooms from a circular to rectangular fisheye with an 180° viewing angle. This review analyses its optical quality, construction and handling.
2026.04.13

Laowa 17mm F/4 Zero-D Shift Review
In-Depth review of the Venus Optics Laowa 17mm F/4 Zero-D Shift Lens. This ultra-wide Shift lens is specifically designed for Mirrorless Digital Cameras and is available in 4 Full-Frame mounts plus 2 Medium-Format ones.
2025.11.13

Best Gifts for Photographers in 2025 by Budget
The annual Neocamera Photography Gift Guide updated to 2025. Find great gifts for photographers with any price budget.
2025.07.07

Stellar Photo Recovery Review
Review of Stellar Photo Recovery V12. This Windows and MacOS software can recover photos and videos in a huge number of formats from memory cards, USB drives, SSDs and HHDs.
2025.05.14

Huion Kamvas 13 Gen 3 Review
In-Depth review of the Huion Kamvas 13 Gen 3 Pen Display Tablet for photographers and graphic artists.
2025.01.18

Fujifilm GFX 2025 Lens Roundup
Lens Review roundup of Fujifilm GFX Medium-Format lenses. Quality, performance and handling of the GF20-35mm F/4R WR, GF30mm F/3.5 Tilt-Shift and the GF55mm F/1.7.
2024.11.18

Best 2024 Photography Gifts for Every Budget
Great gifts for photographers and photo enthusiasts selected for every budget among the best products of 2024.
2024.08.07

Eye Protection Tips for Professional Photographers
The four main considerations for professional photographers regarding eyewear.
2024.07.14

Fujifilm X100VI Review
Flagship fixed-lens compact digital camera with a 40 MP sensor and Image-Stabilization, a first for the series. Retro design featuring dual control-dials, plus direct ISO, Shutter-Speed and EC dials. Its hybrid viewfinder can switch between EVF and OVF mode.
2024.05.09

Fujifilm GFX100 II Review
Flagship 102 Megapixels Medium-Format Mirrorless Digital Camera with 8-Stop 5-Axis IBIS, 8 FPS Drive, 8K Video and 400 MP Super-Resolution capture in a weatherproof and freezeproof body with dual control-dials and dual memory-card slots.
2024.04.03

Fujifilm X-T5 Review
Newest Fujifilm flagship boasting a 40 MP APS-C sensor, 5-axis IBIS with 7-stop efficiency, 15 FPS continuous drive, 6.2K Video capture, dual control-dials and dual SDXC UHS-II slots in a sturdy weatherproof and freezeproof body.
2023.11.20

Best Digital Cameras of 2023
Find out which are the Best Digital Cameras of 2023. All the new Mirrorless Digital Cameras from entry-level to high-end professional.
2026.05.21
2026.04.13
2025.11.13
2025.07.07
2025.05.14
2025.01.18
2024.11.18
2024.08.07
2024.07.14
2024.05.09
2024.04.03
2023.11.20